
Record your screen on Windows with GPU encoding: a complete setup guide
A screen recorder that runs on your graphics card, saves a safe file and starts with one key.
 LAAGU··2 min readTimeline
Your first recording
- Open Timeline and switch to the Recorder tab.
- Click the Record pill (a small red dot and the hotkey), or press AltF11 from anywhere.
- Do what you want to record.
- Click Stop, or press AltF12.
A Timeline pop-up then appears with Open recording and Show in folder. By default recordings go to a Timeline folder inside your Videos folder; you can change that under Save recordings to in the More tab.
Try it in Timeline
Free for Windows 10 and 11. One installer, nothing else to set up.
Where the settings are
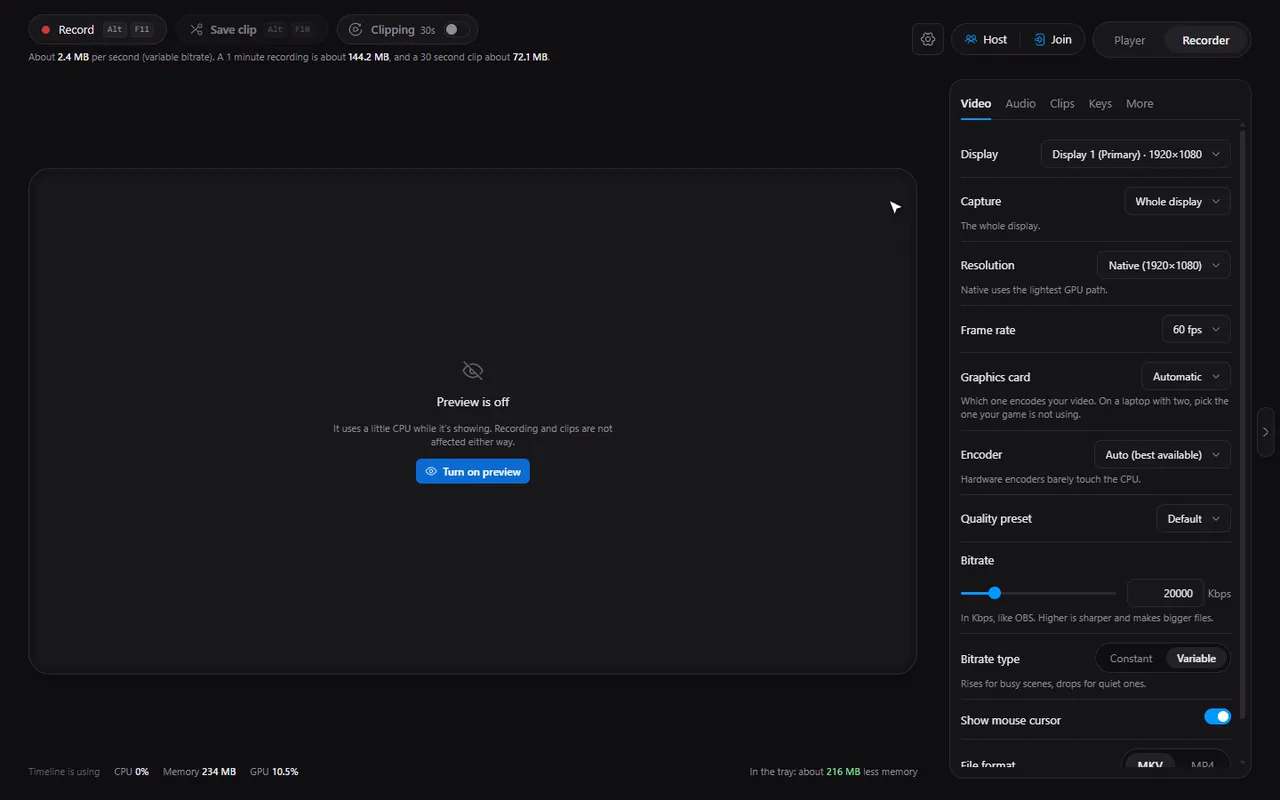
The Recorder has a side panel with five tabs:
| Tab | What is in it |
|---|---|
| Video | Display, what to capture, resolution, frame rate, graphics card, encoder, quality preset, bitrate, mouse cursor, file format |
| Audio | Desktop sound, microphone, tracks, audio quality |
| Clips | Clip length |
| Keys | The three global hotkeys |
| More | Folders, tray behaviour, sounds |
The video settings that matter
- Display: which monitor to record. With several screens, pick the right one.
- Capture: the whole display, one window, or any fullscreen window.
- Resolution: Native (your screen's own size) is the most direct route for the graphics card, with no scaling. You can also pick a smaller size or type a custom one with even numbers.
- Frame rate: 60 fps by default.
- Bitrate: 20,000 Kbps by default, variable. More about these in bitrate, resolution and fps explained.
GPU or processor
Timeline records with the graphics card's hardware encoder where there is one (NVIDIA NVENC, AMD AMF, and AV1 where your card supports it), which barely touches the processor. The Encoder is set to Auto, which picks the best one available. If you ever need to choose yourself, read NVENC, AMF, x264 and AV1.
The file you get
The default format is MKV, which survives a crash: if Windows or the program dies mid-recording, the file is not lost. You can switch to MP4, which plays everywhere. See MKV or MP4.
Watch it while you record
The Recorder shows a live preview of the screen, a REC timer and, while it is on, the clip buffer's state.
Note. Timeline is made for Windows 10 and 11. Recording a game that runs in true exclusive fullscreen can behave differently from borderless or windowed games; if something looks off, try the game in borderless mode.
Questions
Is the recorder free? Is there a watermark?
Timeline is free and adds no watermark.
What are the recording hotkeys?
Alt+F11 starts a recording, Alt+F12 stops it and Alt+F10 saves a clip. You can change all three.
Where are recordings saved?
By default in a Timeline folder inside your Videos folder. Change it under Save recordings to in the More tab.
Can I record the microphone?
Yes. In the Audio tab you can record desktop sound, your microphone, or both. See the audio tracks guide.